RTTY
Since Win-Test version 3 was released it now has the added support for RTTY contests using the MMTTY engine which is used in most Windows based contest logging programs.
Below is how to setup Win-Test for RTTY operation in the quickest and simplest way.
Downloading MMTTY Engine
Note: If you're already using N1MM Logger or WriteLog, you may already have this engine installed so it's worthwhile checking before-hand.
Before you can get started operating RTTY, Win-Test uses the MMTTY engine by JE3HHT, so first task is to go to the MMTTY home page, scroll down the page to where the title says "MMTTY Engine", download the ZIP file and unpack the file into a folder where you will be able to find it. If you wish to use FSK instead of AFSK, be sure to download and install the EXTFSK extention, which is to be found on the same page in a ZIP file named comfsk105.zip. Details for setting up EXTFSK can be found at JA7UDE's and on AA5AU's extensive Getting Started on RTTY pages.
We recommend setting up MMTTY as a standalone application first, before integrating it into Win-Test - especially if you wish to get FSK going. By the way: although it's possible to control your radio from MMTTY, please do not configure it as this will interfere with Win-Test trying to take control. Set up only RTTY decoding and RTTY keying through the sound card and/or COM ports.
Now you are ready to set up Win-Test to launch MMTTY; actually you may even want to have it launch two different instances of MMTTY to go SO2R on RTTY!
Win-Test RTTY configuration
Great, now you've got the engine downloaded and installed it's time to fire up Win-Test and get things setup!
Open the RTTY configuration box
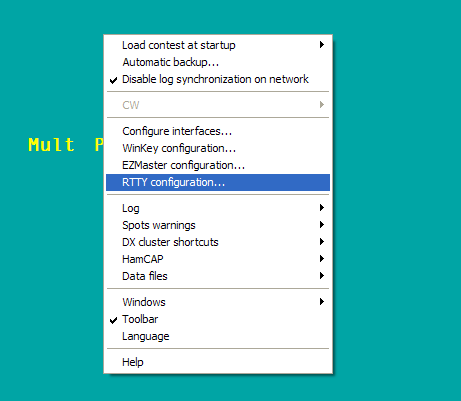
Open a contest file for a RTTY contest and once it has loaded, right-click on the Win-Test background and select "RTTY configuration..."
Enable MMTTY
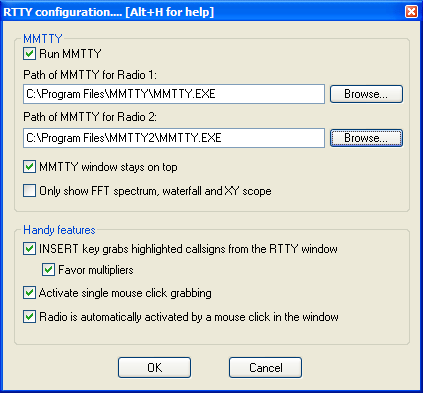
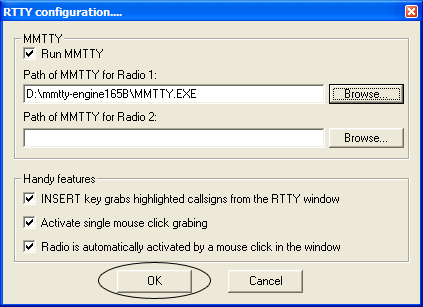
Now you've selected "RTTY configuration" you will be shown a box similar to the one shown above; here you need to click "Run MMTTY" checkbox and add the path to the MMTTY application.
You may chose to have the MMTTY window always on top of the application, which makes sense to tune in to RTTY signals. If you wish to display the FFT diagram, XY scope and waterfall diagram only (without the rest of the MMTTY controls), tag the second option.
Find MMTTY.exe
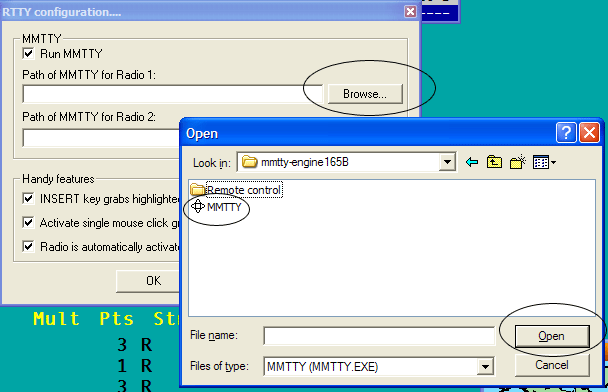
In the RTTY configuration box, click the "Browse..." button and locate where you have placed the MMTTY Engine. For me it's D:\mmtty-engine165B. Select MMTTY.exe and click "Open".
Note: If you want to do SO2R RTTY you need to remember at this point that you need two installations of the MMTTY engine - one for each radio. Add the second path to MMTTY.exe in the blank box.
Save Changes
Once you are happy with all the changes click "OK" to save changes.
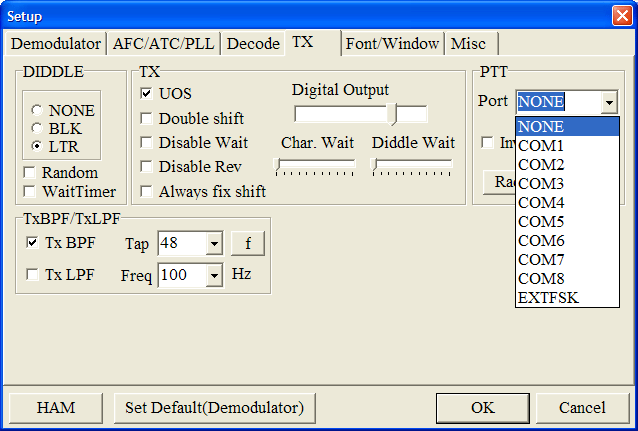
Setup MMTTY PTT Comport
Once at this point you need to restart Win-Test and open up the log file again. This starts MMTTY engine. If you have configured MMTTY standalone before, everything should start to work right away.
Try to receive and decode a RTTY signal. If that works, try to key the transmitter and get on the air by pressing Alt-K. If you can monitor your signal, you should now hear the typical RTTY diddle.
In case you still need to set up something in MMTTY, you may do so from here by clicking Options | Setup in the MMTTY sub-window.
General usage
So you've got it all setup and you're keen to make some QSOs! Here is a basic guide.
Receive/transmit window
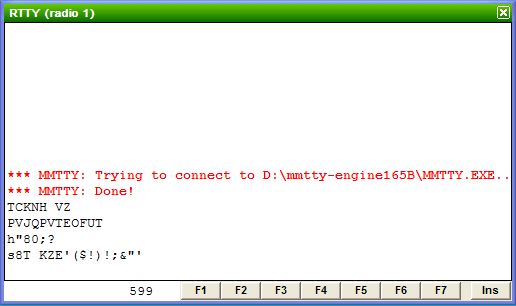
By default Win-Test doesn't open the receive and transmit window automatically so you'll need to do this yourself but it's easy enough! Go to menu item Windows | RTTY(radio 1). This will open up the RTTY receive window for radio 1.
New callsigns are highlighted in blue color, dupes in red, new mults in yellow and new double mults in green. Your own transmission will be displayed in blue.
With the mouse cursor you can click on the callsigns and they will be transferred to the callsign entry field automatically. Clicking on a contest report will copy it into the report field. Most of the function keys have a corresponding button in the receive/transmit windows which you may click with the mouse to activate them. Generally speaking, most situations in RTTY contests can be handled with the mouse, without pressing any key.
If you're running SO2R RTTY, you will need to go back and select Windows | RTTY(radio 2) as well, which will then open up a second RTTY receive window for the second radio.
Defining macros
Most of the macros for transmitting are already setup for you to use out of the box, but sometimes you will want to change them. To do this, press Shift-F1..F7, Shift-[Insert] or Shift-[+]. Note that if you're operating in SO2R or advanced SO2R, you must use the [AltGr] key (or right [Alt], depending on the keyboard layout) instead of the [Shift] key to access these messages.
You will then be able to use the Win-Test Message Variables.
As the ++ and -- accelerators for CW do not make sense on RTTY, you should remove them.
Once you're done, click "Validate".
Please see also to the Configuring CW/RTTY messages chapter for more details.
MMTTY window
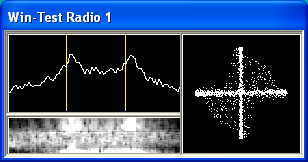
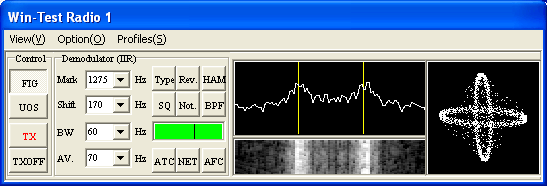
The above screenshot is of the MMTTY window which is opened when operating RTTY.
This is a mimimized version of MMTTY, but it allows you to change most of the settings. For example, to enable the XY scope (the two ellipsoides) go to the View menu of MMTTY and tick the XYScore option. For the rest of the bells and whistles of MMTTY, please see the online help of that software.
See also
RTTY Contesting.com: Great tutorials on how to use MMTTY.
