BestPractice4
Setting up an Kenwood TS-850S with the microHAM microKeyer
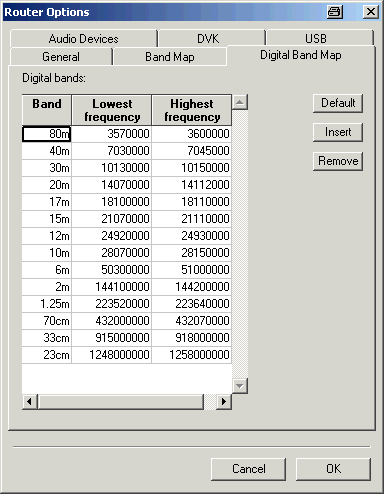
This article is a step by step approach describing how to set up an Kenwood TS-850S radio and a microHAM microKeyer interface. The microKeyer is a complex device integrating a CW-Keyer, CW and FSK keying, PTT control (including a delayed PTT), radio control and a sound interface which allows different audio switching scenarios. This article only covers the set-up of CW and RTTY, since I did not do any SSB operation when I had the device.
BestPractice1 article describes a slightly simpler set-up with the Microham USB Interface II. Please see there for background information about RTTY and MMTTY in general.
Kenwood TS-850 settings
- Press and hold the LSB/USB key while you turn the radio on.
- Select menu item 11 (by turning the the M.CH/VFO.CH knob) and change the setting to ON (by pressing the arrow up/down buttons) if necessary. This will set the polarity of MARK and SPACE signals.
- Select menu item 12 and change the setting to 170 if necessary - this is the typical shift used on the HF bands.
- Select menu item 13 and change the setting to 1275 if necessary. This selects the LOW TONES pair.
- Press the CLR button to leave the setup menu.
To test the settings, put the radio to FSK mode, push the MONI button and then switch the radio to transmit by pressing REC/SEND. You should now hear a 1275 Hz tone. If you short the RTTY jacket on the back of the radio you should hear the tone going up to 1445 Hz.
microHAM micro Keyer
- Make sure you have configured the microHAM Interface for Kenwood using the internal jumpers (see microHAM manual).
- Connect the microHAM micro Keyer to your radio and computer.
- On the radio side there will be five connections: CW, RTTY, ACC1, ACC2 and microphone
- On the computer side there will be three connections: USB, Line-out and Line-in (or microphone). For FSK operation only we can actually leave out the Line-out connection.
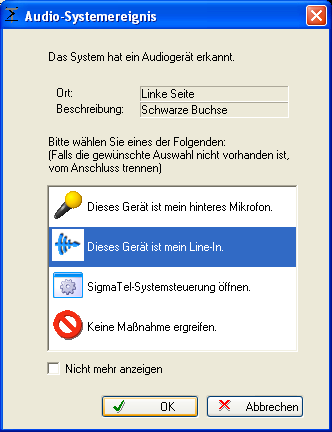
- On my computer, once you connect something to the combined Mic/Line-in jack, a pop-up will ask, if this is a microphone or Line-in (see image below). Select Line-in.
- Install the microHAM software if you haven't done so already. There are two steps to it:
- Installing the device driver - if you have several microHAM devices you will have to do this once for each of them.
- Installing the USB Device Router - this software only needs to be installed once. It is identical on all microHAM products.
Note: If you had previously installed the USB Device Router with another mircoHAM product, it will come up with a new tab for the hardware connected.
microHAM USB Device Router
- Set up the Device Router
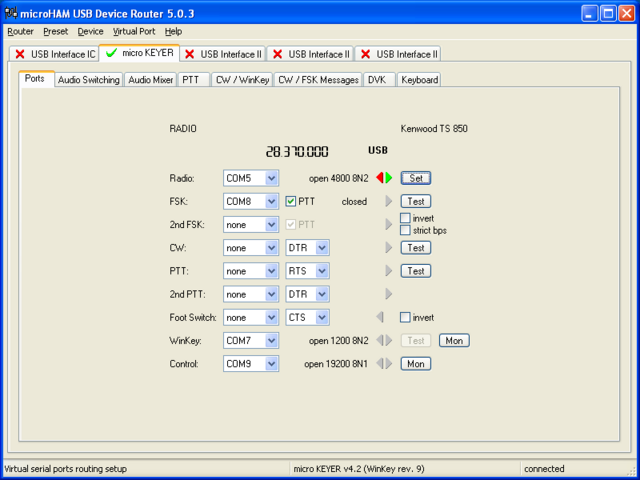
- Go to the Ports Tab
- Create three virtual COM ports: COM5, COM7 and COM8. Note: The absolute port numbers do not matter. The key is consistency - the same port number must be used for a specific function every time it is used.
- Configure Radio on COM5
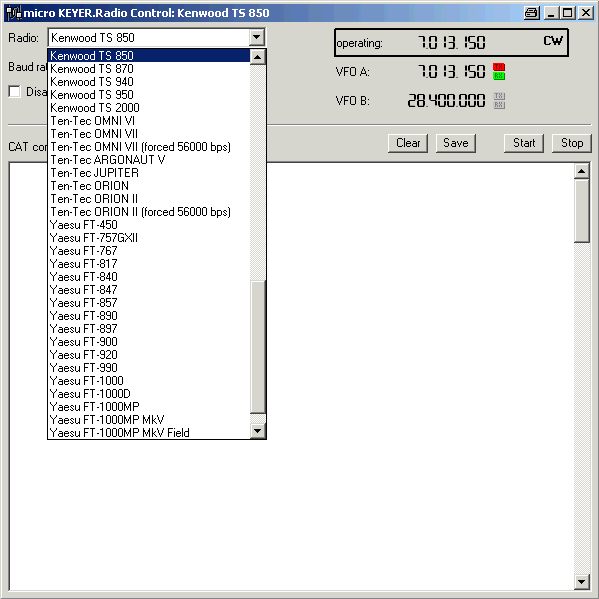
- Press the Set button to the right of the radio port configuration and select TS-850. microKeyer will assign different Audio Routing and PTT scenarios if it knows what frequency and mode the radio is set. This is why we have to do it.
- You should now see the current frequency of the radio display in the Ports tab
- Configure FSK on COM8. Make sure you tick the PTT tag
- Configure Winkey COM7 using Winkey default settings
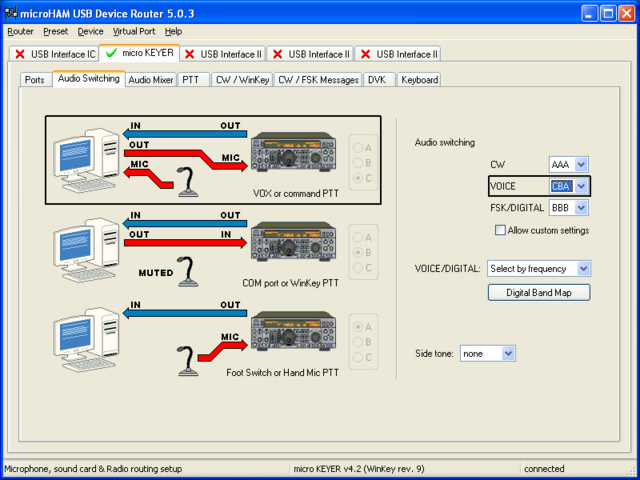
- Go to the Audio Switching Tab
- Configure the Audio Switching as shown below. Make sure you tick "Allow custom settings" first
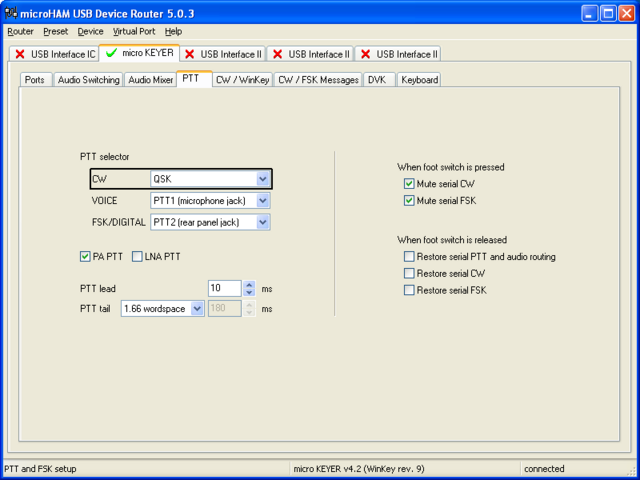
- Go to the PTT Tab
- In the PTT selector, select QSK for CW, PTT1 for Voice and PTT2 for Digital Modes. This will allow using QSK or VOX operation on CW (which I prefer over the microHAM doing all the switching - but mind hot switching PA relays!)
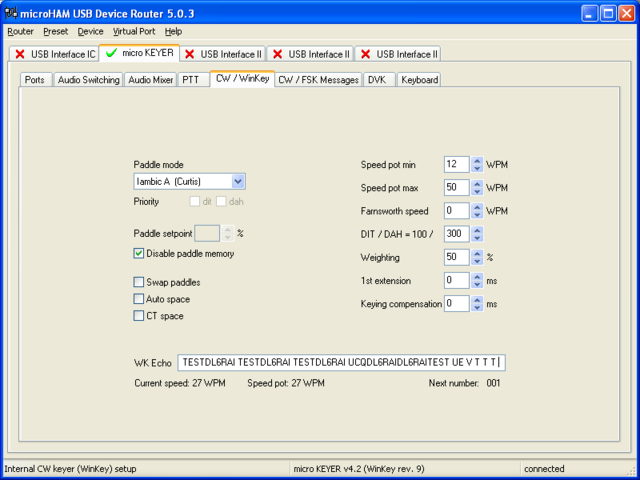
- Go to the CW/WinKey Tab
- My preferred settings are Paddle Mode: Iambic A (Curtis), disable Paddle memory (actually, Dot-Dash-Memory off)
- Testing
- Go to a CW frequency, switch the radio to CW and press the VOX button on the radio (you may even wish to additionally select the FULL button just right to the VOX button on the TS-850 to have full QSK)
- Touch the paddle - the radio should switch to transmit without any relay clicking in the microKeyer
- The CW/FSK LED on the microKeyer should flicker with a red light
- Press the Test button on the Winkey port (COM 7) in the Port Tab. The microKeyer should send Dah dit dit-dit-dit dah
- Go to a SSB frequency and switch the radio to USB or LSB
- Press the microphone's PTT and say something. The radio should go to transmit and produce some output
- Go to a RTTY frequency and switch the radio to FSK
- Press the MON button on the radio to enable the monitor
- Press the Test button on the FSK port (COM8) in the Port Tab. The radio should switch to transmit, send TEST on RTTY and go back to received
- The CW/FSK LED should flicker with a green light and the PTT1/PTT2 LED should turn green, while the radio is on transmit
We are now ready for the next step.
MMTTY
- Download and Install MMTTY from here.
- Start MMTTY
- Activate the XY Scope by selecting the View(V) menu item and tagging XYScope
- Go to Option(O) | Setup MMTTY(O)...
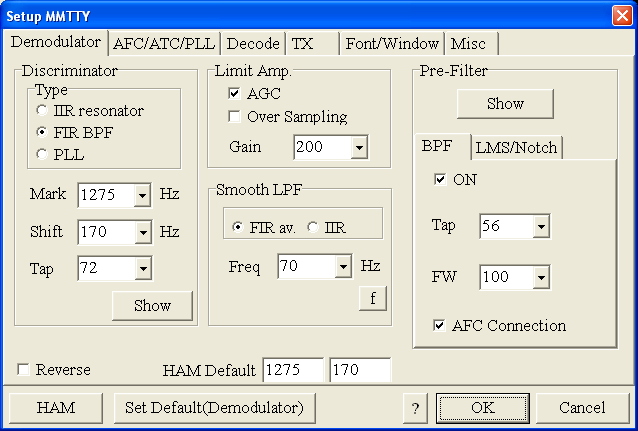
- Select the Demodulator tab and set it up like in the picture below.
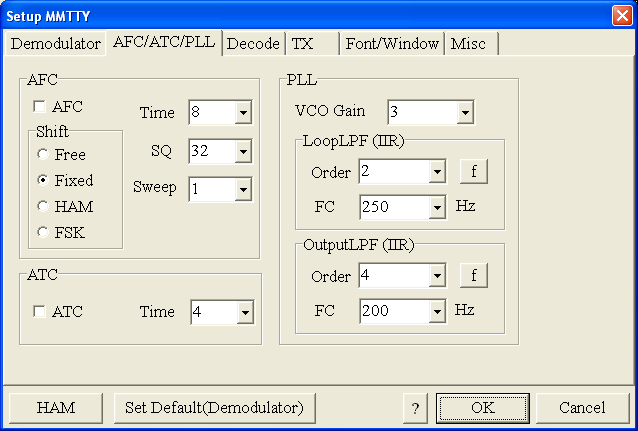
- Select the AFC/ATC/PLL tab and make sure AFC is OFF.
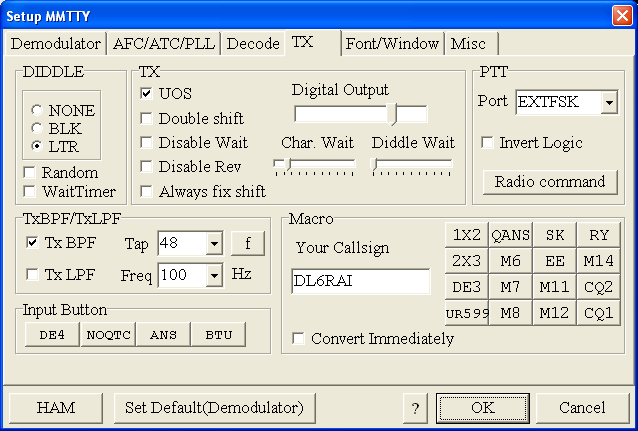
- Select the TX tab and switch PTT port to COM8. The Radio Command button in this setup screen will allow you to control the radio from within MMTTY. This is not desired in this scenario so make sure it is not configured - otherwise Win-Test would not have access to the radio COM port later.
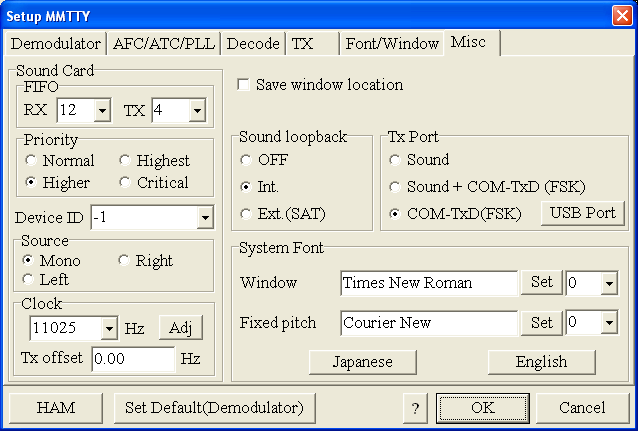
- Select the Misc tab and select COM-TxD(FSK).
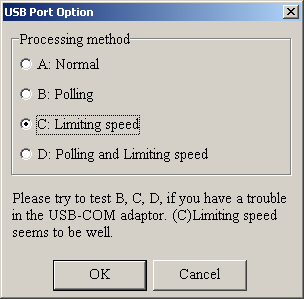
- If you see problems the FSK signal (especially: keying does work, you hear the RTTY diddle, but chars won't be sent), You might need to limit the USB port speed in MMTTY. This setting depends very much on the computer hardware. To limit the USB port speed click on USB Port and configure option "C". You can find this setting also in the support documentation of the microkeyer on the microham website.
- Exit the Setup screens by pressing the OK button.
We are now ready to do some tests with MMTTY.
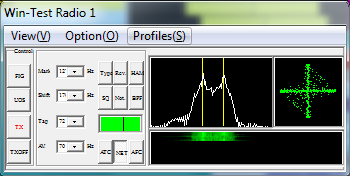
- Now take a look at the XY Scope display. It should look like the picture above.
- If you only see a single white point in the middle of the display, this means, that MMTTY gets no audio to process.
- Check your cabling. Is your cable connected to Line-in or Mic-in?
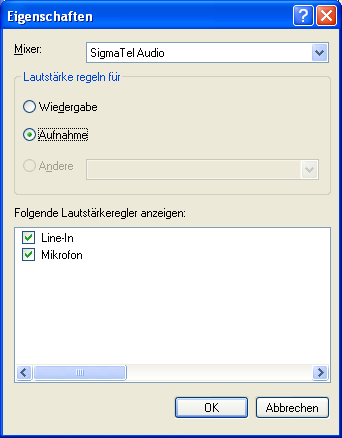
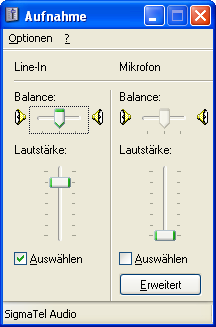
- Check the level setting for your sound card. Open the Sound control (click on the loudspeaker symbol in your task bar), switch to the Recording section and adjust the level for Line-in. When you move the control up and down you should see an increase and decrease in noise level.
- Tune across the CW band and check if the XY scope changes when you hear signals. Once you tune across a carrier or CW signal, you should see a vertical ellipse and then a horizontal ellipse or vice versa depending on which direction you tune. The receive section of the screen will show all kinds of clutter.
- Try to find a RTTY signal (not easy on a normal day). Both ellipses should now be perpendicular to each other. See if you can decode RTTY fine. You may have to select proper filters. I use 500 Hz at 8.8 MHz IF and 2.7 kHz at 455 kHz IF.
- Next, press the TX button in the MMTTY application. You should hear the typical RTTY diddle in the monitor of the radio. The XY Scope will also display a clean RTTY signal.
- Type a few characters (including your callsign) and see how they are transmitted.
- Press the TX button one more time to shut off transmission.
- Exit the MMTTY program now.
MMTTY now works perfectly as a stand-alone progam. We are now ready for Win-Test.
Win-Test
- Start up Win-Test, create a new Win-Test file for testing.
- Configure PTT and CW settings in the Options | Configure Interfaces... menu for a CW contest
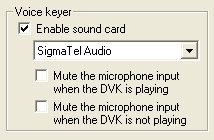
- Configure PTT and Voice Keyer settings in the Options | Configure Interfaces... menu for SSB
- Go to Configure MMTTY.EXE startup path as described in RTTY#Win-Test_RTTY_configuration if you are planning a RTTY contest
- Configure Radio Control in Win-Test
We are now ready to operate the contest.
