BestPractice4
Setting up an Kenwood TS-850S with the microHAM microKeyer
This article is still "under construction".
This article is a step by step approach describing how to set up an Kenwood TS-850S radio and a microHAM microKeyer interface. The microKeyer is a complex device integrating a CW-Keyer, CW and FSK keying, PTT control (including a delayed PTT), radio control and a sound interface which allows different audio switching scenarios.
BestPractice1 article describes a slightly simpler set-up with the Microham USB Interface II. Please see there for background information about RTTY and MMTTY in general.
Kenwood TS-850 settings
- Press and hold the LSB/USB key while you turn the radio on.
- Select menu item 11 and change the setting to ON if necessary. This will set the polarity of MARK and SPACE signals.
- Select menu item 12 and change the setting to 170 if necessary - this is the typical shift used on the HF bands.
- Select menu item 13 and change the setting to 1275 if necessary. This selects the LOW TONES pair.
- Press the CLR button to leave the setup menu.
To test the settings, put the radio to FSK mode, push the MONI button and then switch the radio to transmit by pressing REC/SEND. You should now hear a 1275 Hz tone. If you short the RTTY jacket on the back of the radio you should hear the tone going up to 1445 Hz.
microHAM micro Keyer
- Make sure you have read the user manual and configured the microHAM Interface for Kenwood using the internal jumpers.
- Connect the microHAM micro Keyer to your radio and computer.
- On the radio side there will be five connections: CW, RTTY, ACC1, ACC2 and microphone.
- Connect the microphone of your headset to the USB Keyer using the RJ-45 adapter
- Connect your footswitch
- On the computer side there will be three connections: USB, Line-out and Line-in (or microphone). For FSK operation only we can actually leave out the Line-out connection.
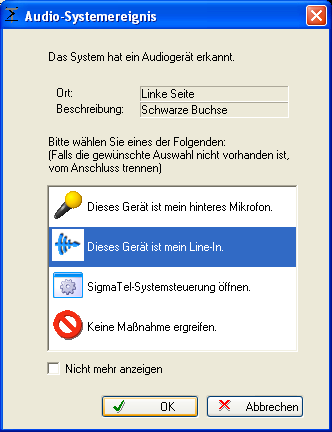
- On my computer, once you connect something to the combined Mic/Line-in jack, a pop-up will ask, if this is a microphone or Line-in (see image below). Select Line-in.
- Install the microHAM software if you haven't done so already. There are two steps to it:
- Installing the device driver - if you have several microHAM devices you will have to do this once for each of them.
- Installing the USB Device Router - this software only needs to be installed once. It is identical on all microHAM products.
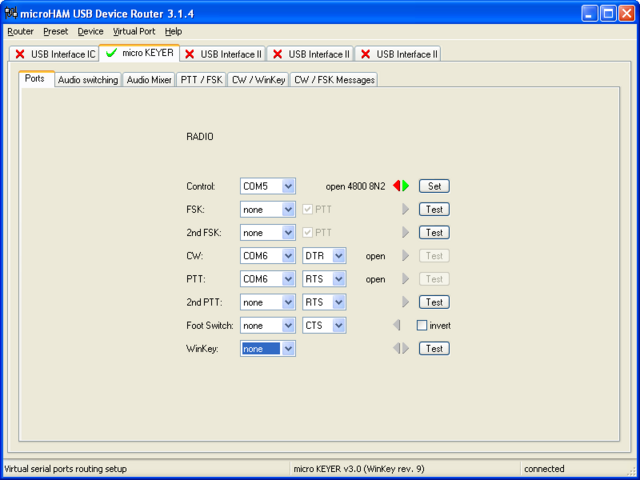
mircoHAM USB Device Router
- Set up the Device Router
- Create two virtual COM ports. Don't try to use same port for radio control PTT/CW/FSK switching - use two different ones, like COM5 and COM6
- Configure Radio on COM5
- Configure CW anfd FSK on COM6 DTR
- Configure PTT on COM6 RTS
- 2nd PTT, Foot Switch, WinKey???
- Configure Audio Switching
- We select a scenario which will
- connect the microphone directly to the radio, when manual PTT
- connect the Line-out to radio Mic input when PTT is controlled from the computer
- We select a scenario which will
- Testing
- Press the Test button on the PTT line. The radio should switch to transmit.
- Press the Test button on the CW line. The sidetone should be audible now.
MMTTY
Please see BestPractice1#MMTTY on how to set-up MMTTY.
Win-Test
- Start up Win-Test, create a new Win-Test file for testing.
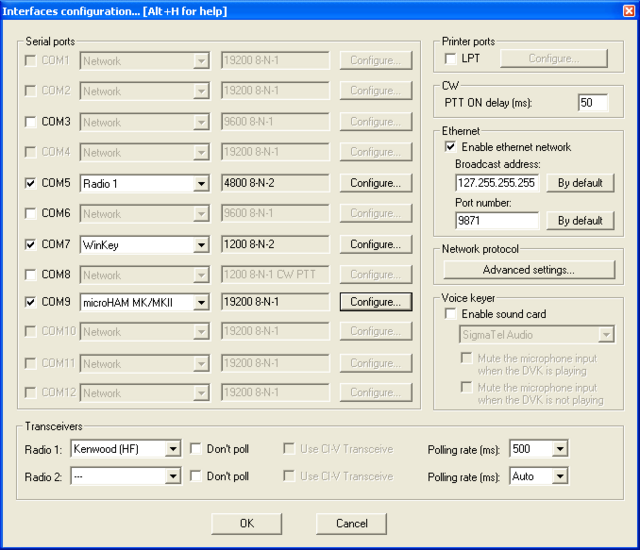
- Configure PTT and CW settings in the Options | Configure Interfaces... menu for a CW contest
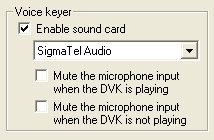
- Configure PTT and Voice Keyer settings in the Options | Configure Interfaces... menu for SSB
- Go to Configure MMTTY.EXE startup path as described in RTTY#Win-Test_RTTY_configuration if you are planning a RTTY contest
- Configure Radio Control in Win-Test
We are now ready to operate the contest.


