Difference between revisions of "Menu:Commands"
| (33 intermediate revisions by 5 users not shown) | |||
| Line 17: | Line 17: | ||
You have to type blind - you will only hear (or see in the RTTY monitor) what you have typed when it's being transmitted. | You have to type blind - you will only hear (or see in the RTTY monitor) what you have typed when it's being transmitted. | ||
| − | Note that in keyboard mode you have the usual function keys available, so instead of typing your callsign, you may simply press '''<tt>[ | + | Note that in keyboard mode you have the usual function keys available, so instead of typing your callsign, you may simply press '''<tt>[F4]</tt>'''. If you have remapped other keys such as the backslash '''<tt>[\]</tt>''' to send your callsign, those keys will ''not'' work in keyboard mode ''unless'' you enable the CW Option [[Menu:Options#Remap_keys_in_keyboard_mode|Remap keys in keyboard mode]]. |
Keyboard mode can also be started with the shortcut '''<tt>Alt-K</tt>'''. | Keyboard mode can also be started with the shortcut '''<tt>Alt-K</tt>'''. | ||
To exit keyboard mode, click on the Stop button, or press ['''<tt>Return</tt>'''] or | To exit keyboard mode, click on the Stop button, or press ['''<tt>Return</tt>'''] or | ||
| − | press again '''<tt>Alt-K</tt>'''. Note that ['''<tt>Escape</tt>'''] | + | press again '''<tt>Alt-K</tt>'''. Note that on CW ['''<tt>Escape</tt>'''] will also exit the Keyboard mode, but it also aborts the transmission if remaining data are still in the buffer. On RTTY, '''<tt>[Escape]</tt>''' empties the TX buffer, but leaves the PTT ON, so you can continue typing until you close the window (which resets the PTT). |
| − | By the way, you can | + | By the way, you can exit the Keyboard mode with '''<tt>Alt-K</tt>''' when you are done typing - you do not need to wait until the transmission finishes. |
==CW Speed...== | ==CW Speed...== | ||
| Line 44: | Line 44: | ||
Open the CW weight dialog box: | Open the CW weight dialog box: | ||
[[Image:cwweight.png|frame|center|CW weight dialog box]] | [[Image:cwweight.png|frame|center|CW weight dialog box]] | ||
| − | This is the weight of dashes to dots - the default value (3.0) should be fine for most people. | + | This is the weight (ratio) of dashes to dots - the default value (3.0) should be fine for most people. |
==Carrier== | ==Carrier== | ||
| − | Sends a carrier to the CW output. You can choose a plain carrier or pulses (in order to take care of the PA while tuning ...). Shortcut '''<tt>Ctrl-T</tt>''', or enter '''<tt>TUNE</tt>''' in the main window. | + | Sends a carrier to the CW output. You can choose a plain carrier or pulses (in order to take care of the PA while tuning ...). Shortcut '''<tt>Ctrl-T</tt>''', or enter '''<tt>TUNE</tt>''' in the main window. For safety reasons, a 30-second timeout automatically stops the transmission no matter what. |
[[Image:carrier.png|frame|center|Tuning carrier]] | [[Image:carrier.png|frame|center|Tuning carrier]] | ||
| Line 58: | Line 58: | ||
A direct access to this dialog box is also possible by typing ['''<tt>Minus</tt>'''] from the numeric keypad, as well as the text command '''<tt>SPLITFREQ</tt>''' in the QSO logging field. | A direct access to this dialog box is also possible by typing ['''<tt>Minus</tt>'''] from the numeric keypad, as well as the text command '''<tt>SPLITFREQ</tt>''' in the QSO logging field. | ||
| − | Note that you can enter only the kHz part of the current band, and that entering an empty field cancels the split mode if it was engaged (as well as the '''<tt>NOSPLIT</tt>''' text command). | + | Enter "+1" or "-5" to set the receive frequency 1 kHz up respectively 5 kHz down. |
| + | |||
| + | Note that you can enter only the kHz part of the current band, and that entering an empty field or "0" cancels the split mode if it was engaged (as well as the '''<tt>NOSPLIT</tt>''' text command). | ||
==QSY frequency== | ==QSY frequency== | ||
| Line 88: | Line 90: | ||
</ul> | </ul> | ||
| − | If Radio2 locates a multiplier you try to work him, but if the pile-up is too bad this is the moment to type '''<tt>SWAP</tt>''' and | + | If Radio2 locates a multiplier you try to work him, but if the pile-up is too bad this is the moment to type '''<tt>SWAP</tt>''' and Win-Test and EZMaster will do all the changes of frequencies and antennas. The amplifier automatically tunes to the antenna of Radio2, you work the multiplier (now with high power), while Radio1 continues calling CQ with low power maintaining the frequency (nobody will take it away). Once you have worked the multiplier on Radio2, type '''<tt>SWAP</tt>''' again and Radio1 will continue to CQ with high power and you continue looking for multipliers on Radio2. |
Another application is looking for a clear frequency with the secondary radio on a new band, while keeping the CQ going on the primary radio. Once you find a clear spot, type '''<tt>SWAP</tt>''' and start CQ-ing on the new band without delay. | Another application is looking for a clear frequency with the secondary radio on a new band, while keeping the CQ going on the primary radio. Once you find a clear spot, type '''<tt>SWAP</tt>''' and start CQ-ing on the new band without delay. | ||
| Line 111: | Line 113: | ||
To make it easier passing a callsign in a multi operating environment, the lower part of window lets you know, by means of filters (combo box), what station is on the band where you wish the calling station to be, and the frequencies of the radios being on that band. | To make it easier passing a callsign in a multi operating environment, the lower part of window lets you know, by means of filters (combo box), what station is on the band where you wish the calling station to be, and the frequencies of the radios being on that band. | ||
| + | |||
| + | ==Operator Login...== | ||
| + | This feature was added to provide a basic operator management. The feature is only available to multi operator logs. | ||
| + | |||
| + | It was mainly added to help DXPeditioners to identify operators for the web log search scripts, and for various DX or contesters challenges (RRDXA etc.). The new text commands '''<tt>OPON</tt>''' or '''<tt>LOGIN</tt>''' allow the operator to identify himself. | ||
| + | The operator change is propagated across the network, meaning that if you login on a station, you will be automatically logged | ||
| + | out of the previous one you were logged on (if any). | ||
| + | |||
| + | <center> | ||
| + | {| | ||
| + | |[[Image:OperatorLogin1.PNG|frame|center|Log in a new Operator using the LOGIN command]] | ||
| + | |[[Image:OperatorLogin2.PNG|frame|center|The current operator's callsign is displayed inside the title bar of Win-Test]] | ||
| + | |} | ||
| + | </center> | ||
| + | |||
| + | When a list of operators was entered in the contest settings dialog when creating the log, it will be parsed to init the combo-box. You can also add ops "on the fly" to this combo box. | ||
| + | |||
| + | If you add nicknames to operators of this list (JOE, JACK, WILLIAM, AVERELL, JOSETTE or whatever - letters and numbers are accepted, | ||
| + | allowing exotic nicknames like L33T etc.), you can enter them as text commands to quickly change operator, without using the '''<tt>OPON</tt>''' command. However, you cannot enter the operator's callsign; this will log a QSO with the operator. | ||
| + | |||
| + | To log off, simply change the operator or use the '''<tt>OPOFF</tt>''' or '''<tt>LOGOOUT</tt>''' text command. | ||
| + | |||
| + | Operators' callsigns are limited to 7 chars, while nicknames are limited to 13 characters in length. | ||
| + | The ADIF file export includes the operator's callsign in the QSO record, if an operator was defined for that QSO. | ||
| + | The text and CSV export files also allow the inclusion the operator's callsign. | ||
| + | |||
| + | When an operator logs on, Win-Test now automatically tries to run an executable (.exe, .bat or .com) named op_"callsign" which must be located in the Win-Test installation directory. For example, if DL6RAI logs in, WT will try to run op_dl6rai.exe (or .bat or .com), if this file exists. If the callsign includes a "/" character, it will be replaced by an underscore ("_"). This feature may be useful to automate various actions. | ||
==Copy-paste the previous QSO== | ==Copy-paste the previous QSO== | ||
| Line 118: | Line 147: | ||
==Receive QTC== | ==Receive QTC== | ||
Shortcut '''<tt>Alt-L</tt>'''. | Shortcut '''<tt>Alt-L</tt>'''. | ||
| − | Only for | + | |
| + | Only for WAEDC contest and for European stations. Opens the QTC RX dialog box | ||
[[Image:qtc-rx.gif|frame|center|QTC RX dialog]] | [[Image:qtc-rx.gif|frame|center|QTC RX dialog]] | ||
| + | |||
| + | See [[WAEDC]] for more information. | ||
| + | |||
| + | ==Transmit QTC== | ||
| + | |||
| + | Shortcut '''<tt>Ctrl-L</tt>'''. | ||
| + | |||
| + | Only for WAEDC contest and for DX stations. Opens the QTC TX dialog box where you can select how many QTCs you want to send: | ||
| + | [[Image:qtc-tx-1.gif|frame|center|Selecting the number of QTCs to transmit]] | ||
| + | |||
| + | After pressing '''ENTER''' or selecting '''10''' You will get something like this: | ||
| + | [[Image:qtc-tx-2.gif|frame|center|Transmitting QTCs]] | ||
| + | |||
See [[WAEDC]] for more information. | See [[WAEDC]] for more information. | ||
| + | |||
| + | |||
| + | ==Turn Antenna to Logged Call (Short Path)== | ||
| + | Shortcut '''<tt>Ctrl-F12</tt>'''. | ||
| + | Turns the antenna to the logged call (short path) in case wtRotators.exe is active and properly configured. | ||
| + | |||
| + | ==Turn Antenna to Logged Call (Long Path)== | ||
| + | Shortcut '''<tt>Alt-F12</tt>'''. | ||
| + | Turns the antenna to the logged call (long path) in case wtRotators.exe is active and properly configured. | ||
==DX-Cluster== | ==DX-Cluster== | ||
| Line 130: | Line 182: | ||
[[Image:DxCluster.gif|frame|center|Sending commands to the DX cluster]] | [[Image:DxCluster.gif|frame|center|Sending commands to the DX cluster]] | ||
| − | The buttons below the entry | + | The buttons below the entry line of that window are pre-defined commands that can be activated by clicking with your mouse. |
[[Image:DxClusterShortcuts.gif|frame|center|The DX Cluster Shortcuts dialog]] | [[Image:DxClusterShortcuts.gif|frame|center|The DX Cluster Shortcuts dialog]] | ||
| − | The count of DX spots and solar data can be set in the [[Menu:Options# | + | The count of DX spots and solar data can be set in the [[Menu:Options#DX_Cluster_window_shortcuts|Options | DX cluster | DX cluster window shortcuts]] menu. This menu also allows you to select which type of DX Cluster you are connecting to, either the DXNet/AK1A/ARcluster type or the DX Spider type, where the command syntax is slightly different. |
| − | Additionally, there are five macro buttons that allow you to store often used commands or sequences. They come in handy for setting up the connection over a flakey or unstable link. | + | Additionally, there are five macro buttons that allow you to store often used commands or sequences. They come in handy for setting up the connection over a flakey or unstable link. Use '''[Shift]''' - Click to edit these macros. |
[[Image:DxClusterMacros.gif|frame|center|The DX Cluster Macros dialog]] | [[Image:DxClusterMacros.gif|frame|center|The DX Cluster Macros dialog]] | ||
| Line 150: | Line 202: | ||
All entered commands are stored in a 10-slot recall buffer, in which you can navigate with the '''[Up]''' and '''[Down]''' arrow keys. | All entered commands are stored in a 10-slot recall buffer, in which you can navigate with the '''[Up]''' and '''[Down]''' arrow keys. | ||
| − | ==Spot== | + | ==Spot...== |
| − | Shortcut '''<tt>Alt- | + | Shortcut '''<tt>Alt-F3</tt>'''. |
| − | Sends | + | |
| − | [[Image:spotastation.png|frame|center|Spot a station]] | + | Sends a DX spot with the callsign of the current call in the callsign field or the previously logged QSO to the DX cluster you are connected to. The frequency is the active frequency of the current radio or the frequency on which the QSO was logged. This even works correctly when the cursor is positioned on a previous QSO. |
| + | |||
| + | [[Image:spotastation.png|frame|center|Spot a station on a DX cluster]] | ||
You can also modify the command (by adding a comment for example), before sending the spot. To cancel sending a spot, close the dialog box or press '''<tt>[Escape]</tt>'''. | You can also modify the command (by adding a comment for example), before sending the spot. To cancel sending a spot, close the dialog box or press '''<tt>[Escape]</tt>'''. | ||
| + | |||
| + | If you have no computer control for your transceiver, you will have to manually enter the frequency before the spot can be sent. | ||
The context menu of the Band Map lets you select the policy after which time (if at all) spots entered by the operator are deleted from the band map. | The context menu of the Band Map lets you select the policy after which time (if at all) spots entered by the operator are deleted from the band map. | ||
| Line 163: | Line 219: | ||
This function will be activated only if: | This function will be activated only if: | ||
| − | * [http://www.dxatlas.com/HamCap/ | + | * [http://www.dxatlas.com/HamCap/ Ham CAP (by VE3NEA)], and its pre-requisite [http://www.greg-hand.com/hfwin32.html VOACAP] [http://www.greg-hand.com/versions/itshfbc_081124.exe v.08.1124W], are installed on your computer |
and | and | ||
| Line 188: | Line 244: | ||
For more information refer to: | For more information refer to: | ||
| − | * [[Menu:Options#HamCAP| | + | * [[HamCAP|HamCap]] Installation and Configuration |
| + | * [[Menu:Options#HamCAP|Options | HamCAP]] | ||
==Insert into BandMap== | ==Insert into BandMap== | ||
| Line 198: | Line 255: | ||
==Station Type== | ==Station Type== | ||
| − | Indicates the station type for the current QSO. This command is useful for multi operators set-ups (M/S or M/2). At the end of each QSO line, you can see: | + | Indicates the station type for the current QSO. This command is useful for multi operators set-ups (M/S or M/2), if the contest rules make a difference between these status for the current category. If not, only the RUN (or RUN / SUPPORT) status can be used. At the end of each QSO line (or in the [[Multi-op/Status_window|Status Window]]), you can see: |
| + | |||
| + | * R : RUN (running station in M/S) | ||
| + | * M : MULT (multiplier station in M/S, non-multipliers worked by multiplier station will be clearly indicated) | ||
| + | * R1 : RUN 1 (First M/2 station) | ||
| + | * R2 : RUN 2 (Second M/2 station) | ||
| + | * R+ : SUPPORT (see below) | ||
| + | |||
| + | The station type can be fixed for a computer so that when you reopen the log, or create a new log, the station type is the same as it was previously. Select the '''Sticky Setting''' checkbox to enable this feature. | ||
| − | + | The + indicates that the station is a SUPPORT station. | |
| − | |||
| − | |||
| − | |||
| − | + | A SUPPORT station has the same settings as the MASTER station it refers to. It allows to have a RUN station, which runs the pile-up, and a RUN SUPPORT station (R+) which searches for multipliers on the same band as the RUN station (usually called INBAND station). As well, there can also be several MULTI, RUN1 stations ... | |
| − | + | {{wbox|Note|The station type has no connection with the network station name in a Multi-OP environment setup which you set up when opening a [[New_Log#Step_2:_Setup_your_log|new log]]. For a correct generation of the Cabrillo file of a M-2 entry, make sure your two active stations are type R1 and R2 - no matter what name they have in the network.}} | |
==CW/RTTY Messages== | ==CW/RTTY Messages== | ||
| − | Sends the CW and RTTY messages '''<tt>F1</tt>'''...'''<tt>F7</tt>''', '''<tt>[Insert]</tt>''' and '''<tt>[+]</tt>'''. | + | Sends the CW and RTTY messages '''<tt>[F1]</tt>'''...'''<tt>[F7]</tt>''', '''<tt>[Insert]</tt>''' and '''<tt>[+]</tt>'''. |
See [[Keys#CW and SSB keyer|Keys]] for more information. | See [[Keys#CW and SSB keyer|Keys]] for more information. | ||
| − | You can also open and modify the '''additional messages'''- | + | You can also open and modify the '''additional messages'''-dialog (which may be opened any time with the shortcut '''<tt>Alt-C</tt>'''). |
[[Image:cw-additional-messages.png|frame|center|Additional CW/RTTY messages dialog]] | [[Image:cw-additional-messages.png|frame|center|Additional CW/RTTY messages dialog]] | ||
| + | |||
| + | Please pay attention to the fact that the [http://docs.win-test.com/wiki/Message_variables Message Variables] (beginning with $), like '''<tt>$MYCALL</tt>''', '''<tt>$SERIAL</tt>''', etc. DO NOT work within these additional messages. | ||
==Remote commands...== | ==Remote commands...== | ||
| − | Allows you send | + | Equivalent to the '''<tt>REMOTE</tt>''' [[Text_commands#Other_Functions|text command]].<br> |
| + | Allows you to send a single text command to the local PC and to all other stations connected to the network at the same time. | ||
| + | |||
| + | In the example below, the '''<tt>NOSYNC</tt>''' text command is being used to temporarily disable log synchronization on the local PC and the remote PC named "20m" (see [[Multi-op/Clearing_all_logs_before_the_start|Clearing all logs before the start]] for why you might need to do this). | ||
| + | |||
| + | [[Image:RemoteCommandDialog.png|frame|center|The '''<tt>REMOTE</tt>''' dialog lets one operator run a command on one or more networked computers]] | ||
| + | |||
| + | After entering the command, a gab message is generated automatically to confirm execution of the command on the local and remote computers, e.g. | ||
| − | + | <code> | |
| + | 20m: 40m: The command "NOSYNC" was carried out. | ||
| + | </code> | ||
| − | + | This menu item is only available if more than one station is available on the network. | |
| − | + | '''Use with great care!''' | |
Revision as of 01:30, 20 December 2016
Menu:Commands
QSY
One band down
Modify the band of the current QSO (logging field), to the nearest lower band (vs frequency). While on 160m, the nearest "lower band" will be 10m. Shortcut: Alt-F1. You can also directly type the desired band (if the logging field is empty, of course), and even a frequency in kHz (such as 14265).
One band up
Modify the band of the current QSO (logging field), to the nearest upper band (vs frequency). While on 10m, the nearest "upper band" will be 160m. Shortcut: Alt-F2. You can also directly type the desired band (if the callsign field is empty, of course), and even a frequency in kHz (such as 14265).
Keyboard mode
Allows you to use the keyboard to generate CW or RTTY text. This is needed in unusual situations, for example to say a few words to your old contesting friend before you send him a report or to manage a DX station to QSY to another band. This feature has no meaning on SSB.
You have to type blind - you will only hear (or see in the RTTY monitor) what you have typed when it's being transmitted.
Note that in keyboard mode you have the usual function keys available, so instead of typing your callsign, you may simply press [F4]. If you have remapped other keys such as the backslash [\] to send your callsign, those keys will not work in keyboard mode unless you enable the CW Option Remap keys in keyboard mode.
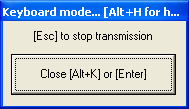
Keyboard mode can also be started with the shortcut Alt-K. To exit keyboard mode, click on the Stop button, or press [Return] or press again Alt-K. Note that on CW [Escape] will also exit the Keyboard mode, but it also aborts the transmission if remaining data are still in the buffer. On RTTY, [Escape] empties the TX buffer, but leaves the PTT ON, so you can continue typing until you close the window (which resets the PTT).
By the way, you can exit the Keyboard mode with Alt-K when you are done typing - you do not need to wait until the transmission finishes.
CW Speed...
Shortcut: Alt-V. Opens the CW speed dialog box:
In this dialog you also can use :
- Up arrow: Increases the speed by 1 WPM
- Page up: Increases the speed by 2 WPM
- Down arrow: Decreases the speed by 1 WPM
- Page down: Decreases the speed by 2 WPM
The CW-Speed can also changed via Alt-F9 (decreases by 2 WPM) and Alt-F10 (increases by 2 WPM) while operating.
Finally, you can also directly enter a speed (in WPM) in the callsign field and hit Alt-V.
CW Weight...
Open the CW weight dialog box:
This is the weight (ratio) of dashes to dots - the default value (3.0) should be fine for most people.
Carrier
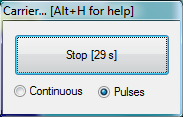
Sends a carrier to the CW output. You can choose a plain carrier or pulses (in order to take care of the PA while tuning ...). Shortcut Ctrl-T, or enter TUNE in the main window. For safety reasons, a 30-second timeout automatically stops the transmission no matter what.
To exit this mode, click on the Stop button, press [Return] or [Escape].
Split frequency
Allows to directly adjust the split frequency of the current radio.
A direct access to this dialog box is also possible by typing [Minus] from the numeric keypad, as well as the text command SPLITFREQ in the QSO logging field.
Enter "+1" or "-5" to set the receive frequency 1 kHz up respectively 5 kHz down.
Note that you can enter only the kHz part of the current band, and that entering an empty field or "0" cancels the split mode if it was engaged (as well as the NOSPLIT text command).
QSY frequency
Allows you to adjust directly the QSY frequency on the current band.
In the dialog box, you can also use and save the current frequency as a the QSY frequency, by clicking the central button.
You can also have a direct access to this dialog box by using QSYFREQ or PASSFREQ text commands.
This frequency will then appear in the status window.
QSY to run frequency
This command will bring you back to the last frequency and mode on which you hit [F1] (=CQ, your last run frequency). It is accessible with the shortcut Alt-F4.
Swap the frequency on both radios
Shortcut: Ctrl-S
After typing SWAP or pressing Ctrl-S, the frequency of the primary radio is swapped with the secondary radio frequency, and this radio now becomes the primary radio. Imagine Radio2 is primary radio on 21025 and Radio1 is on 7001 After typing SWAP the primary radio is Radio1 on 21025. Secondary radio is now Radio2 on 7001.
This is slightly different to pressing the [*] key, where only primary and secondary radios are swapped.
One of the possibilities that is offered by this command, is to be able to work with a single automatic amplifier (for example ACOM 2000A) with two radios. With Win-Test and EZMaster this is possible.
The scenario is as follows:
- Radio1 running, calling CQ (high power)
- Radio2 looking for multipliers (low power)
If Radio2 locates a multiplier you try to work him, but if the pile-up is too bad this is the moment to type SWAP and Win-Test and EZMaster will do all the changes of frequencies and antennas. The amplifier automatically tunes to the antenna of Radio2, you work the multiplier (now with high power), while Radio1 continues calling CQ with low power maintaining the frequency (nobody will take it away). Once you have worked the multiplier on Radio2, type SWAP again and Radio1 will continue to CQ with high power and you continue looking for multipliers on Radio2.
Another application is looking for a clear frequency with the secondary radio on a new band, while keeping the CQ going on the primary radio. Once you find a clear spot, type SWAP and start CQ-ing on the new band without delay.
Take a sked
Shortcut Alt-E. To take a sked with a station, the following dialog box appears :
You must write down the callsign of the station you want to take a sked with (the current callsign in the logging field will be taken by default), the time of the sked (possibly specifying if this time must shifted + 24h, see comment below), the frequency, the mode (only in a multi mode contest), and an optional comment. Once recorded, the sked will appear in the skeds window.
Remark about the time of the sked : checking the "+ 24 h" box does not always mean that the sked will be taken for "tomorrow", but that the time must be shifted by + 24 hours.
Example 1 : It is Saturday 1000z. You take a sked for Sunday 0600z : do not check the "+ 24 h" box.
Example 2 : It is Saturday 0400z. You take a sked for Sunday 0600z : you must check the "+ 24 h" box, otherwise the sked will be taken for saturday 0600z !
Pass a station
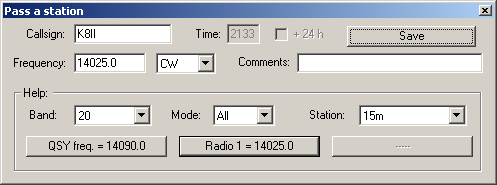
Shortcut Alt-D. To pass a callsign to another operating position (multi operators), the following window appears :
You must write down the callsign of the station you want to pass (default: the callsign in the logging field), the frequency, the mode (only during a multi mode contest), and an optional comment. Once OK is pressed, the infomation will appear in the skeds window.
To make it easier passing a callsign in a multi operating environment, the lower part of window lets you know, by means of filters (combo box), what station is on the band where you wish the calling station to be, and the frequencies of the radios being on that band.
Operator Login...
This feature was added to provide a basic operator management. The feature is only available to multi operator logs.
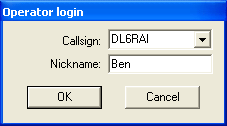
It was mainly added to help DXPeditioners to identify operators for the web log search scripts, and for various DX or contesters challenges (RRDXA etc.). The new text commands OPON or LOGIN allow the operator to identify himself. The operator change is propagated across the network, meaning that if you login on a station, you will be automatically logged out of the previous one you were logged on (if any).
When a list of operators was entered in the contest settings dialog when creating the log, it will be parsed to init the combo-box. You can also add ops "on the fly" to this combo box.
If you add nicknames to operators of this list (JOE, JACK, WILLIAM, AVERELL, JOSETTE or whatever - letters and numbers are accepted, allowing exotic nicknames like L33T etc.), you can enter them as text commands to quickly change operator, without using the OPON command. However, you cannot enter the operator's callsign; this will log a QSO with the operator.
To log off, simply change the operator or use the OPOFF or LOGOOUT text command.
Operators' callsigns are limited to 7 chars, while nicknames are limited to 13 characters in length. The ADIF file export includes the operator's callsign in the QSO record, if an operator was defined for that QSO. The text and CSV export files also allow the inclusion the operator's callsign.
When an operator logs on, Win-Test now automatically tries to run an executable (.exe, .bat or .com) named op_"callsign" which must be located in the Win-Test installation directory. For example, if DL6RAI logs in, WT will try to run op_dl6rai.exe (or .bat or .com), if this file exists. If the callsign includes a "/" character, it will be replaced by an underscore ("_"). This feature may be useful to automate various actions.
Copy-paste the previous QSO
Shortcut Alt-[UP]. This copies the callsing from previous QSO to the QSO edit field. Useful for passed stations or after QSY.
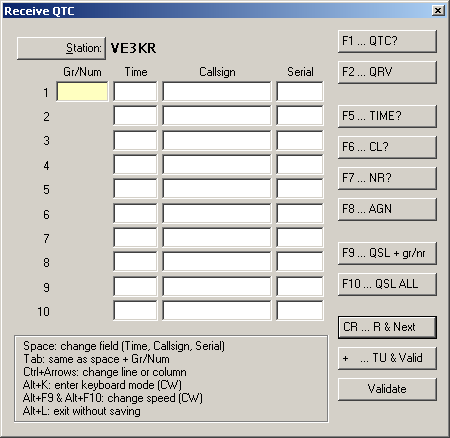
Receive QTC
Shortcut Alt-L.
Only for WAEDC contest and for European stations. Opens the QTC RX dialog box
See WAEDC for more information.
Transmit QTC
Shortcut Ctrl-L.
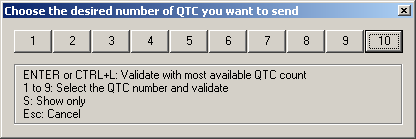
Only for WAEDC contest and for DX stations. Opens the QTC TX dialog box where you can select how many QTCs you want to send:
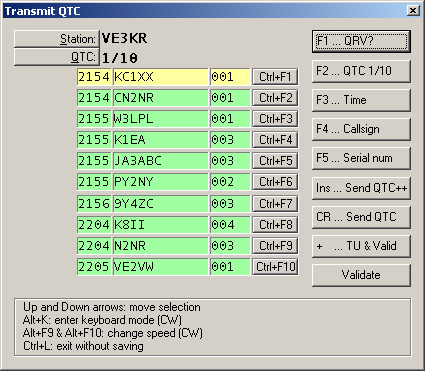
After pressing ENTER or selecting 10 You will get something like this:
See WAEDC for more information.
Turn Antenna to Logged Call (Short Path)
Shortcut Ctrl-F12. Turns the antenna to the logged call (short path) in case wtRotators.exe is active and properly configured.
Turn Antenna to Logged Call (Long Path)
Shortcut Alt-F12. Turns the antenna to the logged call (long path) in case wtRotators.exe is active and properly configured.
DX-Cluster
Shortcut Alt-T. This window allows you to send commands to the DX cluster you are connected to. These commands are then forwarded either to a TNC physically connected on a COM port, a DX Cluster connection established via the wtDxTelnet application or a remote TNC in a multi computer network.
The buttons below the entry line of that window are pre-defined commands that can be activated by clicking with your mouse.
The count of DX spots and solar data can be set in the Options | DX cluster | DX cluster window shortcuts menu. This menu also allows you to select which type of DX Cluster you are connecting to, either the DXNet/AK1A/ARcluster type or the DX Spider type, where the command syntax is slightly different.
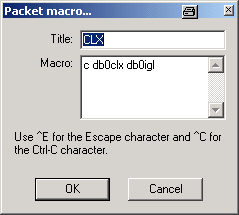
Additionally, there are five macro buttons that allow you to store often used commands or sequences. They come in handy for setting up the connection over a flakey or unstable link. Use [Shift] - Click to edit these macros.
Since pressing [Escape] would close the current window, you can use Ctrl-E to send an Escape character to the TNC (if it is in WA8DED host mode) to generate commands like
* I DL6RAI
* S1
* CDB0IGL
All entered commands are stored in a 10-slot recall buffer, in which you can navigate with the [Up] and [Down] arrow keys.
Spot...
Shortcut Alt-F3.
Sends a DX spot with the callsign of the current call in the callsign field or the previously logged QSO to the DX cluster you are connected to. The frequency is the active frequency of the current radio or the frequency on which the QSO was logged. This even works correctly when the cursor is positioned on a previous QSO.
You can also modify the command (by adding a comment for example), before sending the spot. To cancel sending a spot, close the dialog box or press [Escape].
If you have no computer control for your transceiver, you will have to manually enter the frequency before the spot can be sent.
The context menu of the Band Map lets you select the policy after which time (if at all) spots entered by the operator are deleted from the band map.
Propagation forecast
Shortcut Ctrl-P.
This function will be activated only if:
- Ham CAP (by VE3NEA), and its pre-requisite VOACAP v.08.1124W, are installed on your computer
and
- a CALLSIGN is typed in the entry field
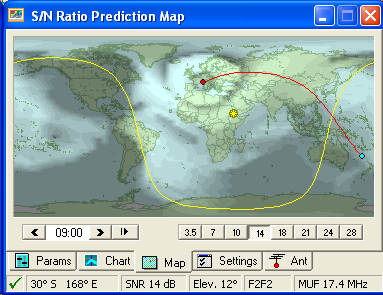
This is a sample of a Propagation Prediction Map you can get.
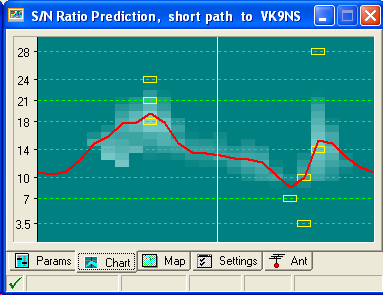
Clicking on the Chart Tab this is what will appear:
This is a very comprehensive and useful representation.
The red curve shows the statistical median MUF (50% Maximum Usable Frequency), while the yellow boxes mark the best hour for each ham frequency.
For more information refer to:
- HamCap Installation and Configuration
- Options | HamCAP
Insert into BandMap
Shortcut Ctrl-[Enter]. Inserts - into the band map of the active radio - the callsign captured in the logging field. This is very useful, especially while hunting for multipliers, to quickly detect a station in the band when you turn the VFO knob.
Active Radio
Switches the active radio. A double-click on one of the VFOs of the corresponding Bandmap will provide the same result. The "*" key also swaps the 2 radios (useful for SO2R operation).
Station Type
Indicates the station type for the current QSO. This command is useful for multi operators set-ups (M/S or M/2), if the contest rules make a difference between these status for the current category. If not, only the RUN (or RUN / SUPPORT) status can be used. At the end of each QSO line (or in the Status Window), you can see:
- R : RUN (running station in M/S)
- M : MULT (multiplier station in M/S, non-multipliers worked by multiplier station will be clearly indicated)
- R1 : RUN 1 (First M/2 station)
- R2 : RUN 2 (Second M/2 station)
- R+ : SUPPORT (see below)
The station type can be fixed for a computer so that when you reopen the log, or create a new log, the station type is the same as it was previously. Select the Sticky Setting checkbox to enable this feature.
The + indicates that the station is a SUPPORT station.
A SUPPORT station has the same settings as the MASTER station it refers to. It allows to have a RUN station, which runs the pile-up, and a RUN SUPPORT station (R+) which searches for multipliers on the same band as the RUN station (usually called INBAND station). As well, there can also be several MULTI, RUN1 stations ...
Note: The station type has no connection with the network station name in a Multi-OP environment setup which you set up when opening a new log. For a correct generation of the Cabrillo file of a M-2 entry, make sure your two active stations are type R1 and R2 - no matter what name they have in the network.
CW/RTTY Messages
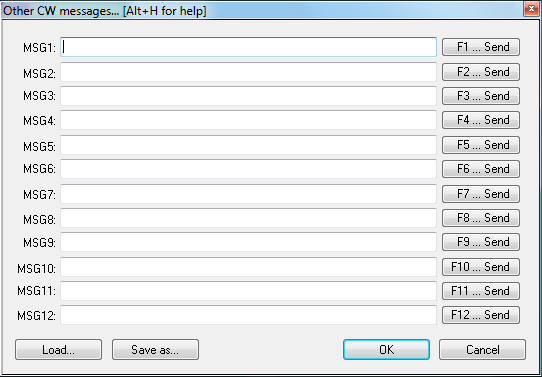
Sends the CW and RTTY messages [F1]...[F7], [Insert] and [+]. See Keys for more information.
You can also open and modify the additional messages-dialog (which may be opened any time with the shortcut Alt-C).
Please pay attention to the fact that the Message Variables (beginning with $), like $MYCALL, $SERIAL, etc. DO NOT work within these additional messages.
Remote commands...
Equivalent to the REMOTE text command.
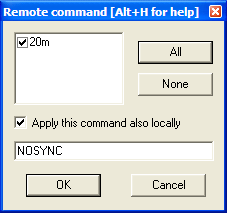
Allows you to send a single text command to the local PC and to all other stations connected to the network at the same time.
In the example below, the NOSYNC text command is being used to temporarily disable log synchronization on the local PC and the remote PC named "20m" (see Clearing all logs before the start for why you might need to do this).
After entering the command, a gab message is generated automatically to confirm execution of the command on the local and remote computers, e.g.
20m: 40m: The command "NOSYNC" was carried out.
This menu item is only available if more than one station is available on the network.
Use with great care!
